0%

【SpringBoot】SpringBootWeb开发

如何利用SpringBoot写一个Web项目

一、访问静态资源

1.1 源码分析

1
2
3
4
5
6
7
8
9
10
11
12
13
14
15
16
17
18
19
20
@Override
public void addResourceHandlers(ResourceHandlerRegistry registry) {
if (!this.resourceProperties.isAddMappings()) {
logger.debug("Default resource handling disabled");
return;
} //如果有手动配置访问路径,默认静态资源位置失效
Duration cachePeriod = this.resourceProperties.getCache().getPeriod();
CacheControl cacheControl = this.resourceProperties.getCache().getCachecontrol().toHttpCacheControl();
if (!registry.hasMappingForPattern("/webjars/**")) {
customizeResourceHandlerRegistration(registry.addResourceHandler("/webjars/**")
.addResourceLocations("classpath:/META-INF/resources/webjars/")
.setCachePeriod(getSeconds(cachePeriod)).setCacheControl(cacheControl));
}//访问/webjars/**,就会从/META-INF/resources/webjars/下寻找对应的资源
String staticPathPattern = this.mvcProperties.getStaticPathPattern();
if (!registry.hasMappingForPattern(staticPathPattern)) {
customizeResourceHandlerRegistration(registry.addResourceHandler(staticPathPattern)
.addResourceLocations(getResourceLocations(this.resourceProperties.getStaticLocations()))
.setCachePeriod(getSeconds(cachePeriod)).setCacheControl(cacheControl));
} // private String staticPathPattern = "/**" ,访问链接为此时,都会被this.resourceProperties.getStaticLocations()识别
}
1
2
3
4
5
6
7
8
9
public String[] getStaticLocations() {
return this.staticLocations;
}
//跳转"staticLocations"
private String[] staticLocations = CLASSPATH_RESOURCE_LOCATIONS;
//跳转"CLASSPATH_RESOURCE_LOCATIONS"
private static final String[] CLASSPATH_RESOURCE_LOCATIONS = { "classpath:/META-INF/resources/",
"classpath:/resources/", "classpath:/static/", "classpath:/public/" };
// "/**"进行静态资源访问,则会从以下目录寻找资源

1.2 利用webjars

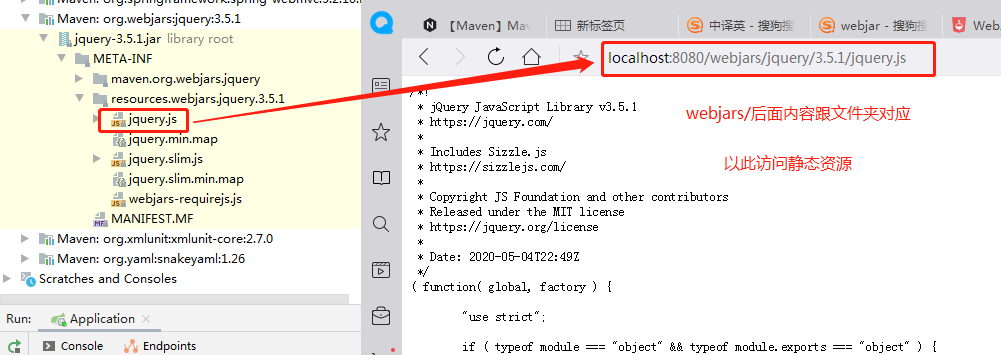
  • 导入依赖,通过网页访问webjars/*,来进行访问静态资源
  • 但此方法局限性比较高,基本不会使用

1.3 使用默认静态资源位置

  • 源码分析,静态资源可以存放在一下位置
    • (1)classpath:/META-INF/resources/
    • (2)classpath:/resources/
    • (3)classpath:/static/
    • (4)classpath:/public/
  • 资源访问的优先级:resources > static > public

二、定制首页

2.1 源码分析

1
2
3
4
5
6
7
8
9
                           //获取首页
private Optional<Resource> getWelcomePage() {
String[] locations = getResourceLocations(this.resourceProperties.getStaticLocations());//静态资源目录获取首页
return Arrays.stream(locations).map(this::getIndexHtml).filter(this::isReadable).findFirst();
}

private Resource getIndexHtml(String location) {
return this.resourceLoader.getResource(location + "index.html");//寻找静态资源里名字为index.html的页面
}
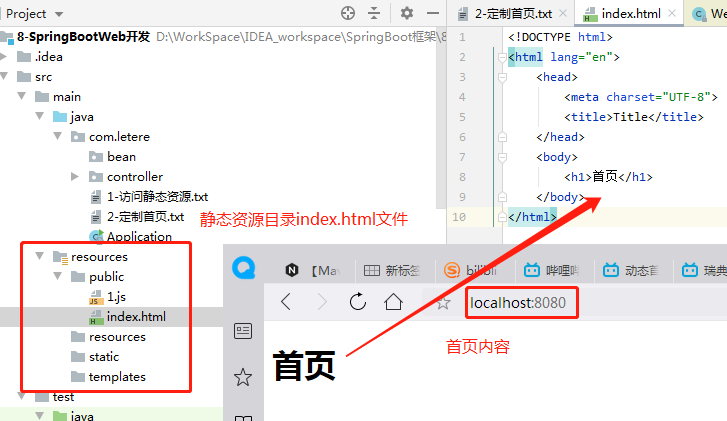
  • 总结:首页名字为”index.html”,并将此文件放在静态资源文件夹中

2.2 实例

  • 创建一个index.html文件,放在默认静态资源文件夹
1
2
3
4
5
6
7
8
9
10
<!DOCTYPE html>
<html lang="en">
<head>
<meta charset="UTF-8">
<title>Title</title>
</head>
<body>
<h1>首页</h1>
</body>
</html>

2.3 彩蛋:定制图标

  • favicon.ico图标放在静态资源文件夹内

三、thymeleaf模板引擎

3.1 介绍

  • 模板引擎:将后端数据和前端页面结合,渲染成一个网页
  • thymeleaf是其中一个模板引擎

3.2 使用方法

  • (1)源码分析
1
2
3
4
5
6
7
8
9
thymeleaf自动配置类:ThymeleafProperties
public class ThymeleafProperties {

private static final Charset DEFAULT_ENCODING = StandardCharsets.UTF_8; //字符集编码

public static final String DEFAULT_PREFIX = "classpath:/templates/"; //前缀

public static final String DEFAULT_SUFFIX = ".html"; //后缀
}
  • 总结:thymeleaf作用于视图解析器一样,都是对字符串进行拼接跳转,跳转到”/templates/Xxxx.html”文件

  • (2)导入启动器依赖

1
2
3
4
<dependency>
<groupId>org.springframework.boot</groupId>
<artifactId>spring-boot-starter-thymeleaf</artifactId>
</dependency>
  • (3)编写Controller接口以及对应的跳转页面
1
2
3
4
5
6
7
8
9
10
11
12
13
Controller接口
@Controller
public class HelloController {

@RequestMapping("/thymeleaf")
public String thymeleaf(Model model){
model.addAttribute("msg", "Message");
model.addAttribute("msg2","<h1>Message2<h1>");

model.addAttribute("list", Arrays.asList("咕料", "C酱"));
return "hello";
}
}
1
2
3
4
5
6
7
8
9
10
11
12
13
14
15
16
17
18
19
20
21
22
跳转页面
<!DOCTYPE html>
<html lang="en" xmlns:th="http://www.thymeleaf.org">
<head>
<meta charset="UTF-8">
<title>Title</title>
</head>
<body>
<h1>hello thymeleaf!</h1>

<!--所有html元素都可以被thymeleaf替换接管:th:元素名-->
<div th:text="${msg}"></div> <!--取值-->
<div th:utext="${msg2}"></div><!--不转义取值-->

<div th:each="name:${list}" th:text="${name}"/><!--遍历元素:两种方法都可以-->

<div th:each="name:${list}">
[[ ${name} ]]
</div>

</body>
</html>

四、拓展配置MVC

4.1 拓展方法

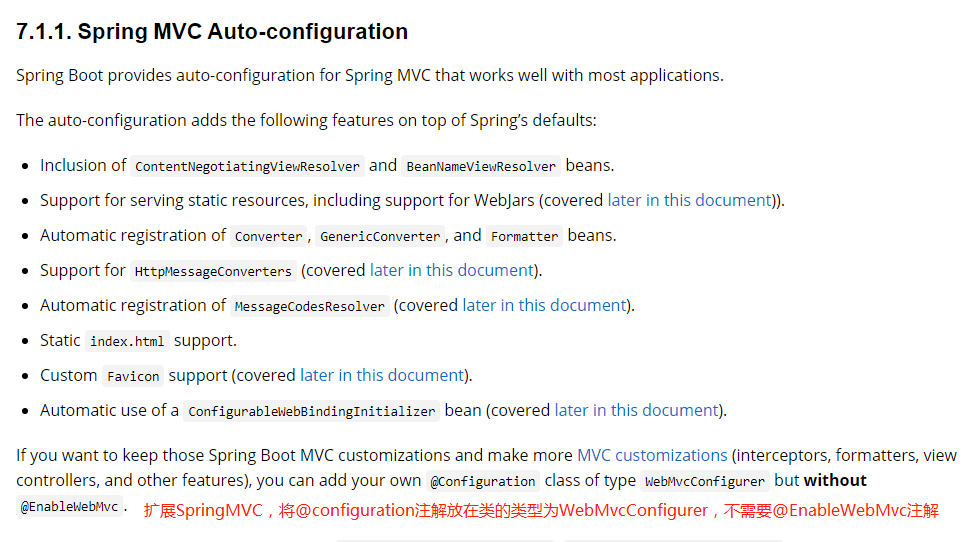
  • 总结: 添加@Configuration注解到类型为WebMvcConfigurer的类中,不要添加@EnableWebMvc注解
  • 举例:
1
2
3
4
@Configuration //配置类
public class MyMvcConfig implements WebMvcConfigurer { //实现WebMVCConfigurer接口
//跟Spring全注解开发的配置类使用类似
}

4.2 添加@EnableWebMVC注解

  • (1)源码分析
1
2
3
4
5
6
7
8
9
10
11
12
13
14
15
16
17
18
19
20
21
22
23
24
25
26
源码分析:
@Retention(RetentionPolicy.RUNTIME)
@Target(ElementType.TYPE)
@Documented
@Import(DelegatingWebMvcConfiguration.class) //此注解导入一个DelegatingWebMvcConfiguration
public @interface EnableWebMvc {
}
||跳转
@Configuration(proxyBeanMethods = false)
public class DelegatingWebMvcConfiguration extends WebMvcConfigurationSupport { //此类继承于WebMvcConfigurationSupport
//省略
}

--------------------------------------------------
回到WebMvc自动配置类WebMvcAutoConfiguration中

@Configuration(proxyBeanMethods = false)
@ConditionalOnWebApplication(type = Type.SERVLET)
@ConditionalOnClass({ Servlet.class, DispatcherServlet.class, WebMvcConfigurer.class })
@ConditionalOnMissingBean(WebMvcConfigurationSupport.class) //如果不存在WebMvcConfigurationSupport.class才会自动装配
@AutoConfigureOrder(Ordered.HIGHEST_PRECEDENCE + 10)
@AutoConfigureAfter({ DispatcherServletAutoConfiguration.class, TaskExecutionAutoConfiguration.class,
ValidationAutoConfiguration.class })
public class WebMvcAutoConfiguration {
//省略
}
  • (2)总结:
    • 一旦我们添加@EnableWebMvc,SpringBoot不再加载自动配置类,我们自定义的配置类全面接管了WebMvc的配置