Vue组件开发使用
一、组件化的基本认识
1.1 Vue组件化思想
- 组件化是Vue.js中的重要思想
- 它提供了一种抽象,让我们可以开发出一个个独立可用的小组件来构造我们的应用
- 任何的应用都会被抽象成一棵组件树
1.2 注册组件的基本步骤
- (1)创建组件构造器
- (2)注册组件
- (3)使用组件
二、组件化的基本使用
1
2
3
4
5
6
7
8
9
10
11
12
13
14
15
16
17
18
19
20
21
22
23
24
25
26
27
28
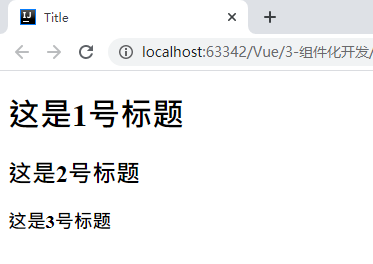
| <div id="app">
<cpn></cpn>
</div>
<script src="../../js/vue.js"></script>
<script>
const cpnConstructor = Vue.extend({
template: `
<div>
<h1>这是1号标题</h1>
<h2>这是2号标题</h2>
<h3>这是3号标题</h3>
</div>
` //添加模板
});
Vue.component('cpn', cpnConstructor);
const app = new Vue({
el: '#app',
});
</script>
|
三、全局组件和局部组件
3.1 全局组件
1
2
3
4
5
6
7
8
9
10
11
12
13
14
15
16
17
18
19
20
21
22
23
24
25
26
27
28
29
30
31
| <div id="app">
<cpn></cpn>
</div>
<div id="app2">
<cpn></cpn>
</div>
<script src="../../js/vue.js"></script>
<script>
const cpnC = Vue.extend({
template: `
<div>
<h3>我是标题</h3>
<P>我是内容</P>
</div>
`
});
const component = Vue.component("cpn", cpnC);
const app = new Vue({
el: '#app'
});
const app2 = new Vue({
el: "#app2"
})
</script>
|
3.2 局部组件
1
2
3
4
5
6
7
8
9
10
11
12
13
14
15
16
17
18
19
20
21
22
23
24
25
26
27
28
29
30
31
32
| <div id="app">
<cpn></cpn>
</div>
<div id="app2">
<cpn></cpn>
</div>
<script src="../../js/vue.js"></script>
<script>
const cpnC = Vue.extend({
template: `
<div>
<h3>我是标题</h3>
<P>我是内容</P>
</div>
`
});
const app = new Vue({
el: '#app',
components: {
cpn: cpnC
}
});
const app2 = new Vue({
el: "#app2"
})
</script>
|
四、父子组件的区别
1
2
3
4
5
6
7
8
9
10
11
12
13
14
15
16
17
18
19
20
21
22
23
24
25
26
27
28
29
30
31
32
33
34
35
36
37
38
39
40
| <div id="app">
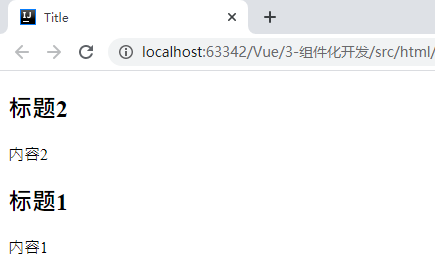
<cpn2></cpn2>
</div>
<script src="../../js/vue.js"></script>
<script>
const cpnC1 = Vue.extend({
template: `
<div>
<h2>标题1</h2>
<p>内容1</p>
</div>
`
});
const cpnC2 = Vue.extend({
template: `
<div>
<h2>标题2</h2>
<p>内容2</p>
<cpn1></cpn1>
</div>
`,
components: {
cpn1: cpnC1
}
});
const app = new Vue({
el: '#app',
components: {
cpn2: cpnC2
}
});
</script>
|
十、通信案例
利用父子组件通信的形式,实现父子组件双向绑定
10.1 方式一
父组件通过props传值给子组件,子组件通过自定义事件来传值给父组件
1
2
3
4
5
6
7
8
9
10
11
12
13
14
15
16
17
18
19
20
21
22
23
24
25
26
27
28
29
30
31
32
33
34
35
36
37
38
39
40
|
<div id="app">
<cpn :numb="num" @valuechange="numbchange"></cpn>
</div>
<template id="cpn">
<div>
<h2>props:{{numb}}</h2>
<h2>data:{{dnumb}}</h2>
<input type="text" v-model="dnumb" @input="$emit('valuechange', dnumb)">
</div>
</template>
<script src="../../js/vue.js"></script>
<script>
const app = new Vue({
el: '#app',
data: {
num: 1
},
methods: {
numbchange(value){
this.num = parseInt(value)
}
},
components: {
cpn: {
template: "#cpn",
props: {
numb: Number
},
data(){
return {
dnumb: this.numb
}
}
}
}
});
</script>
|
10.2 方法二
利用watch属性,watch监听属性值的改变,大量代码和上面重复,会适当用’…’来省略
1
2
3
4
5
6
7
8
9
10
11
12
13
14
15
16
17
18
19
20
21
22
23
24
25
26
27
28
29
| ...
<template id="cpn">
<div>
...
<input type="text" v-model="dnumb">
</div>
</template>
<script src="../../js/vue.js"></script>
<script>
const app = new Vue({
...
components: {
cpn: {
...
/*
watch:监听属性值的改变,一旦改变,就调用方法
属性值.(newValue)
属性值.(newValue, oldValue)
*/
watch: {
dnumb(newValue){
this.$emit("valuechange", newValue);
}
}
}
}
});
</script>
|
十一、父子组件访问
11.1 父访问子
- (1)$children
- $children会返回html中使用的所有子组件对象,用数组保存,实际开发中不怎么常用
1
2
3
4
5
6
7
8
9
10
11
12
13
14
15
16
17
18
19
20
21
22
23
24
25
26
27
28
29
30
31
32
33
34
35
| <div id="app">
<cpn></cpn>
<cpn></cpn>
<button @click="btnClick1()">按钮($children)</button>
</div>
<template id="cpn">
<div>
<h2>我是子组件</h2>
</div>
</template>
<script src="../../js/vue.js"></script>
<script>
const app = new Vue({
el: '#app',
methods:{
btnClick1(){
this.$children[0].showMessage();
this.$children[1].showMessage();
}
},
components: {
cpn: {
template: "#cpn",
methods: {
showMessage(){
alert("成功调用子组件方法哦!")
}
}
}
}
});
</script>
|
1
2
3
4
5
6
7
8
9
10
11
12
13
14
15
16
17
18
19
20
21
22
23
24
25
26
27
28
29
30
31
32
33
| <div id="app">
<cpn ref="cpn3"></cpn>
<button @click="btnClick2()">按钮($refs)</button>
</div>
<template id="cpn">
<div>
<h2>我是子组件</h2>
</div>
</template>
<script src="../../js/vue.js"></script>
<script>
const app = new Vue({
el: '#app',
methods:{
btnClick2(){
this.$refs.cpn3.showMessage();
}
},
components: {
cpn: {
template: "#cpn",
methods: {
showMessage(){
alert("成功调用子组件方法哦!")
}
}
}
}
});
</script>
|
11.2 子访问父
1
2
3
4
5
6
7
8
9
10
11
12
13
14
15
16
17
18
19
20
21
22
23
24
25
26
27
28
29
30
31
32
33
34
35
36
37
38
39
40
41
42
43
44
45
46
47
48
49
50
51
52
53
54
55
56
57
58
59
60
61
62
| <div id="app">
<h2>我是父/根组件</h2>
<cpn></cpn>
</div>
<template id="cpn">
<div>
<h2>|--我是子组件1</h2>
<button @click="btnClick1()">子组件1:$parent</button>
<button @click="btnClick2()">子组件1:$root</button>
<cpn2></cpn2>
</div>
</template>
<template id="cpn2">
<div>
<h2>|----我是子组件1-1</h2>
<button @click="btnClick1_1()">子组件1-1:$parent</button>
<button @click="btnClick2_1()">子组件1-1:$root</button>
</div>
</template>
<script src="../../js/vue.js"></script>
<script>
const app = new Vue({
el: '#app',
methods: {
showMessage(){
alert("成功调用父组件方法!")
}
},
components: {
cpn: {
template: "#cpn",
methods: {
btnClick1() {
this.$parent.showMessage();
},
btnClick2(){
this.$root.showMessage();
}
},
components: {
cpn2: {
template: "#cpn2",
methods: {
btnClick1_1() {
this.$parent.btnClick1();
},
btnClick2_1() {
this.$root.showMessage();
}
}
}
}
}
}
});
</script>
|
十二、slot插槽
12.1 基本使用
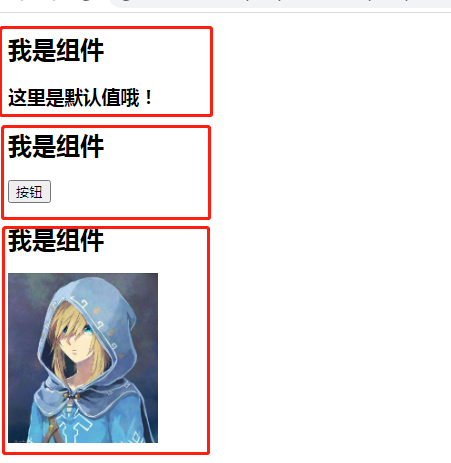
- 组件插槽的目的是让组件具有更强的扩展性
- 插槽使用思想:抽取共性,保留不同
1
2
3
4
5
6
7
8
9
10
11
12
13
14
15
16
17
18
19
20
21
22
23
24
25
26
27
28
29
30
| <div id="app">
<cpn></cpn>
<cpn>
<button>按钮</button>
</cpn>
<cpn>
<img src="林克.jpg" width="150" height="170">
</cpn>
</div>
<template id="cpn">
<div>
<h2>我是组件</h2>
<slot>
<h3>这里是默认值哦!</h3>
</slot>
</div>
</template>
<script src="../../js/vue.js"></script>
<script>
const app = new Vue({
el: '#app',
components: {
cpn: {
template: "#cpn"
}
}
});
</script>
|
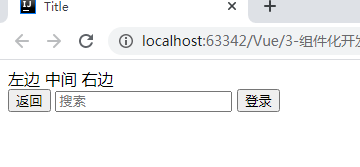
12.2 具名插槽使用
1
2
3
4
5
6
7
8
9
10
11
12
13
14
15
16
17
18
19
20
21
22
23
24
25
26
27
28
29
30
31
32
33
34
| <div id="app">
<cpn></cpn>
<cpn>
<button slot="left">返回</button>
<input slot="center" type="text" placeholder="搜索">
<button slot="right">登录</button>
</cpn>
</div>
<template id="cpn">
<div>
<slot name="left">
<span>左边</span>
</slot>
<slot name="center">
<span>中间</span>
</slot>
<slot name="right">
<span>右边</span>
</slot>
</div>
</template>
<script src="../../js/vue.js"></script>
<script>
const app = new Vue({
el: '#app',
components: {
cpn: {
template: "#cpn"
}
}
});
</script>
|
12.3 编译的作用域
1
2
3
4
5
6
7
8
9
10
11
12
13
14
15
16
17
18
19
20
21
22
23
24
25
26
27
28
29
30
| <div id="app">
<cpn v-show="isShow"></cpn>
</div>
<template id="cpn">
<div>
<h2>这是组件</h2>
<button v-show="isShow">按钮</button>
</div>
</template>
<script src="../../js/vue.js"></script>
<script>
const app = new Vue({
el: '#app',
data: {
isShow: true
},
components: {
cpn: {
template: "#cpn",
data() {
return {
isShow: false
}
}
}
}
});
</script>
|
- 总结:变量的作用域是看模板,在app模板下的所有变量都是查看app根组件中的数据,在cpn模板下的变量是查看cpn组件的数据
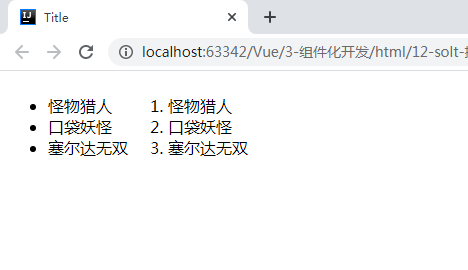
12.4 作用域插槽
- 作用域插槽:父组件替换插槽的标签,但是内容由子组件来提供
1
2
3
4
5
6
7
8
9
10
11
12
13
14
15
16
17
18
19
20
21
22
23
24
25
26
27
28
29
30
31
32
33
34
35
36
37
38
39
40
| <div id="app">
<cpn></cpn>
<cpn>
<template v-slot="slot">
<ol>
<li v-for="game in slot.data">{{game}}</li>
</ol>
</template>
</cpn>
</div>
<template id="cpn">
<div style="float: left">
<slot :data="games">
<ul>
<li v-for="game in games">{{game}}</li>
</ul>
</slot>
</div>
</template>
<script src="../../js/vue.js"></script>
<script>
const app = new Vue({
el: '#app',
components: {
cpn: {
template: "#cpn",
data(){
return {
games: ["怪物猎人", "口袋妖怪", "塞尔达无双"]
}
}
}
}
});
</script>
|
