0%

【Vue】Vue实战项目

Vue总结性实战项目

一、项目开发

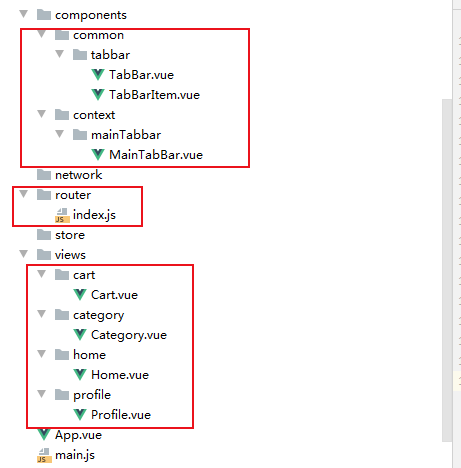
1.1 目录结构划分

  • 开发中先把大概的目录结构划分好,使开发变得简洁

1.2 css文件引入

1
2
3
4
5
6
7
8
9
10
11
12
13
14
15
16
17
18
19
20
21
22
23
24
25
26
27
28
29
30
31
32
33
34
35
36
37
38
39
40
41
42
43
44
45
46
47
48
49
50
51
52
53
54
55
56
@import "./normalize.css";

/*:root -> 获取根元素html*/
:root {
--color-text: #666;
--color-high-text: #ff5777;
--color-tint: #ff8198;
--color-background: #fff;
--font-size: 14px;
--line-height: 1.5;
}

*,
*::before,
*::after {
margin: 0;
padding: 0;
box-sizing: border-box;
}

body {
font-family: "Helvetica Neue",Helvetica,"PingFang SC","Hiragino Sans GB","Microsoft YaHei","微软雅黑",Arial,sans-serif;
user-select: none; /* 禁止用户鼠标在页面上选中文字/图片等 */
-webkit-tap-highlight-color: transparent; /* webkit是苹果浏览器引擎,tap点击,highlight背景高亮,color颜色,颜色用数值调节 */
background: var(--color-background);
color: var(--color-text);
/* rem vw/vh */
width: 100vw;
}

a {
color: var(--color-text);
text-decoration: none;
}


.clear-fix::after {
clear: both;
content: '';
display: block;
width: 0;
height: 0;
visibility: hidden;
}

.clear-fix {
zoom: 1;
}

.left {
float: left;
}

.right {
float: right;
}
  • (3)去App.vue中引入base.css
1
2
3
4
...
<style>
@import "./assets/css/base.css";
</style>

1.3 设置额外配置

  • (1)创建一个vue.config.js文件,里面填写配置信息
1
2
3
4
5
6
7
8
9
10
11
12
module.exports = {
configureWebpack: {
resolve: {
alias: { //配置别名
//'@': "src", 默认配置
'assets': "@/assets",
"common": "@/common",
"network": "@/network"
}
}
}
}
  • (2)弄一个.editorconfig文件,来统一小组开发的代码风格
1
2
3
4
5
6
7
8
9
root = true

[*]
charset = utf-8
indent_style = space
indent_size = 2
end_of_line = lf
insert_final_newline = true
trim_trailing_whitespace = true

1.4 引入Tabbar

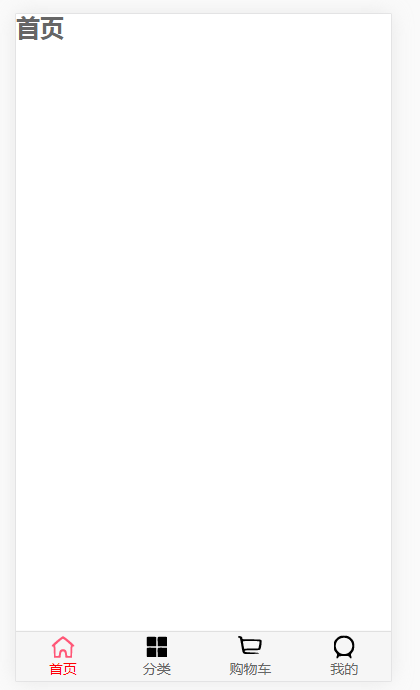
  • 把之前做的前端路由小案例引入进来,具体看之前的文章

二、首页开发

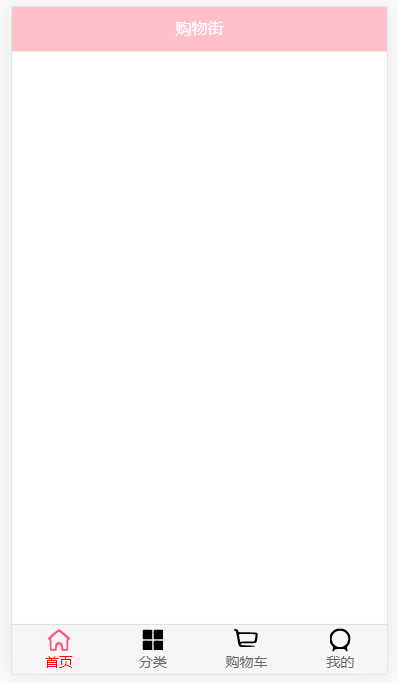
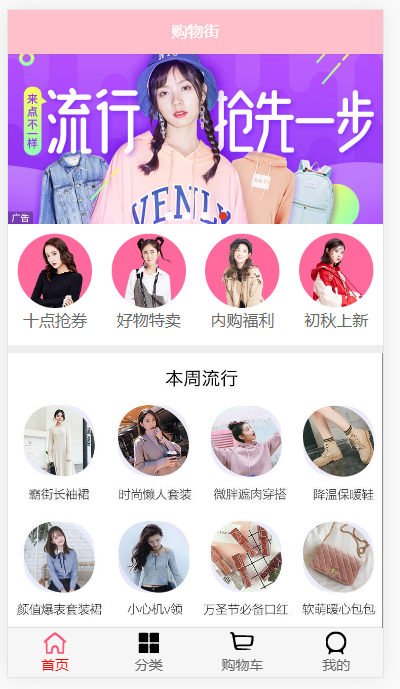
2.1 导航栏的封装和使用

  • (1)因为多个页面都会使用导航栏,所以将导航栏的插件放在./components/common/navbar/NavBar.vue
1
2
3
4
5
6
7
8
9
10
11
12
13
14
15
16
17
18
19
20
21
22
23
24
25
26
27
28
29
30
31
32
33
34
35
36
37
38
<template>
<div class="nav-bar">
<!--为了适用多个页面,生成三个具名插槽-->
<div class="left"> <!--为了能够设置插槽的大小,用div包装起来,在div中设置-->
<solt name="left"></solt>
</div>
<div class="center">
<slot name="center"></slot>
</div>
<div class="right">
<slot name="right"></slot>
</div>
</div>
</template>

<script>
export default {
name: "NavBar"
}
</script>

<style scoped>
.nav-bar {
display: flex;
height: 44px;
line-height: 44px; /* 顶部导航栏一般大小为44px */
text-align: center; /* 文字居中 */
box-shadow: 0 1px 1px rgba(100, 100, 100, .1); /* 边框渐变色 */
}

.left, .right {
width: 44px; /* 设置左右宽度 */
}

.center {
flex: 1; /* 把中间的部分占满 */
}
</style>
  • (2)在首页组件使用导航栏
1
2
3
4
5
6
7
8
9
10
11
12
13
14
15
16
17
18
19
20
<template>
<div id="home">
<nav-bar class="home-nav">
<div slot="center"> <!--使用中间的具名插槽-->
购物街
</div>
</nav-bar>
</div>
</template>

<script>
...
</script>

<style scoped>
.home-nav { /* 设置首页导航栏特有的样式 */
background-color: pink;
color: white;
}
</style>

2.2 请求首页多个数据

  • (1)封装axios网络请求
    • 好处:减少项目对此的依赖,解耦
1
2
3
4
5
6
7
8
9
10
import Axios from "axios";

export function request(config) {
const instance = Axios.create({
baseURL: "http://123.207.32.32:8000",
timeout: 5000
});

return instance(config)
}
  • (2)封装首页的网络请求
    • 好处:方便管理,解耦
1
2
3
4
5
6
7
8
9
import {request} from "./request";

//对所有请求的首页数据进行封装,方便管理
export function getHomeMultidata() {
return request({
url: "/home/multidata",
method: "get"
});
}
  • (3)Home.vue保存请求的数据
1
2
3
4
5
6
7
8
9
10
11
12
13
14
15
16
17
18
19
20
21
22
...
<script>
import {getHomeMultidata} from "network/home"

export default {
...
data() { //保存网络请求的数据
return {
banners: [],
recommends: []
}
},
created() {
getHomeMultidata().then(res => { //请求数据,并保存在data中
console.log(res.data);
this.banners = res.data.data.banner.list;
this.recommends = res.data.data.recommend.list;
})
}
}
</script>
...

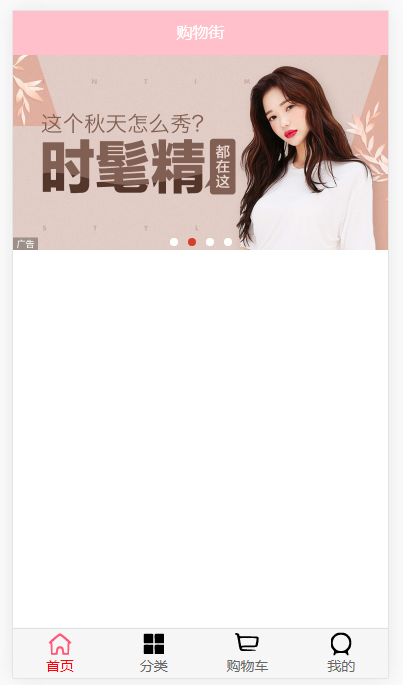
2.3 实现轮播图

  • (1)创建一个新文件夹swiper来保存轮播图组件

    1
    2
    3
    4
    5
    6
    7
    8
    9
    10
    11
    12
    13
    14
    15
    16
    17
    18
    19
    20
    21
    22
    23
    24
    25
    26
    27
    28
    29
    30
    31
    32
    33
    34
    35
    36
    37
    38
    39
    40
    41
    42
    43
    44
    45
    46
    47
    48
    49
    50
    51
    52
    53
    54
    55
    56
    57
    58
    59
    60
    61
    62
    63
    64
    65
    66
    67
    68
    69
    70
    71
    72
    73
    74
    75
    76
    77
    78
    79
    80
    81
    82
    83
    84
    85
    86
    87
    88
    89
    90
    91
    92
    93
    94
    95
    96
    97
    98
    99
    100
    101
    102
    103
    104
    105
    106
    107
    108
    109
    110
    111
    112
    113
    114
    115
    116
    117
    118
    119
    120
    121
    122
    123
    124
    125
    126
    127
    128
    129
    130
    131
    132
    133
    134
    135
    136
    137
    138
    139
    140
    141
    142
    143
    144
    145
    146
    147
    148
    149
    150
    151
    152
    153
    154
    155
    156
    157
    158
    159
    160
    161
    162
    163
    164
    165
    166
    167
    168
    169
    170
    171
    172
    173
    174
    175
    176
    177
    178
    179
    180
    181
    182
    183
    184
    185
    186
    187
    188
    189
    190
    191
    192
    193
    194
    195
    196
    197
    198
    199
    200
    201
    202
    203
    204
    205
    206
    207
    208
    209
    210
    211
    212
    213
    214
    215
    216
    217
    218
    219
    220
    221
    222
    223
    224
    225
    226
    227
    228
    229
    230
    231
    232
    233
    234
    235
    236
    237
    238
    239
    240
    241
    242
    243
    244
    245
    246
    <!--Swiper.vue-->
    <template>
    <div id="hy-swiper">
    <div class="swiper" @touchstart="touchStart" @touchmove="touchMove" @touchend="touchEnd">
    <slot></slot>
    </div>
    <slot name="indicator">
    </slot>
    <div class="indicator">
    <slot name="indicator" v-if="showIndicator && slideCount>1">
    <div v-for="(item, index) in slideCount" class="indi-item" :class="{active: index === currentIndex-1}" :key="index"></div>
    </slot>
    </div>
    </div>
    </template>

    <script>
    export default {
    name: "Swiper",
    props: {
    interval: {
    type: Number,
    default: 3000
    },
    animDuration: {
    type: Number,
    default: 300
    },
    moveRatio: {
    type: Number,
    default: 0.25
    },
    showIndicator: {
    type: Boolean,
    default: true
    }
    },
    data: function () {
    return {
    slideCount: 0, // 元素个数
    totalWidth: 0, // swiper的宽度
    swiperStyle: {}, // swiper样式
    currentIndex: 1, // 当前的index
    scrolling: false, // 是否正在滚动
    }
    },
    mounted: function () {
    // 1.操作DOM, 在前后添加Slide
    setTimeout(() => {
    this.handleDom();

    // 2.开启定时器
    this.startTimer();
    }, 3000)
    },
    methods: {
    /**
    * 定时器操作
    */
    startTimer: function () {
    this.playTimer = window.setInterval(() => {
    this.currentIndex++;
    this.scrollContent(-this.currentIndex * this.totalWidth);
    }, this.interval)
    },
    stopTimer: function () {
    window.clearInterval(this.playTimer);
    },

    /**
    * 滚动到正确的位置
    */
    scrollContent: function (currentPosition) {
    // 0.设置正在滚动
    this.scrolling = true;

    // 1.开始滚动动画
    this.swiperStyle.transition ='transform '+ this.animDuration + 'ms';
    this.setTransform(currentPosition);

    // 2.判断滚动到的位置
    this.checkPosition();

    // 4.滚动完成
    this.scrolling = false
    },

    /**
    * 校验正确的位置
    */
    checkPosition: function () {
    window.setTimeout(() => {
    // 1.校验正确的位置
    this.swiperStyle.transition = '0ms';
    if (this.currentIndex >= this.slideCount + 1) {
    this.currentIndex = 1;
    this.setTransform(-this.currentIndex * this.totalWidth);
    } else if (this.currentIndex <= 0) {
    this.currentIndex = this.slideCount;
    this.setTransform(-this.currentIndex * this.totalWidth);
    }

    // 2.结束移动后的回调
    this.$emit('transitionEnd', this.currentIndex-1);
    }, this.animDuration)
    },

    /**
    * 设置滚动的位置
    */
    setTransform: function (position) {
    this.swiperStyle.transform = `translate3d(${position}px, 0, 0)`;
    this.swiperStyle['-webkit-transform'] = `translate3d(${position}px), 0, 0`;
    this.swiperStyle['-ms-transform'] = `translate3d(${position}px), 0, 0`;
    },

    /**
    * 操作DOM, 在DOM前后添加Slide
    */
    handleDom: function () {
    // 1.获取要操作的元素
    let swiperEl = document.querySelector('.swiper');
    let slidesEls = swiperEl.getElementsByClassName('slide');

    // 2.保存个数
    this.slideCount = slidesEls.length;

    // 3.如果大于1个, 那么在前后分别添加一个slide
    if (this.slideCount > 1) {
    let cloneFirst = slidesEls[0].cloneNode(true);
    let cloneLast = slidesEls[this.slideCount - 1].cloneNode(true);
    swiperEl.insertBefore(cloneLast, slidesEls[0]);
    swiperEl.appendChild(cloneFirst);
    this.totalWidth = swiperEl.offsetWidth;
    this.swiperStyle = swiperEl.style;
    }

    // 4.让swiper元素, 显示第一个(目前是显示前面添加的最后一个元素)
    this.setTransform(-this.totalWidth);
    },

    /**
    * 拖动事件的处理
    */
    touchStart: function (e) {
    // 1.如果正在滚动, 不可以拖动
    if (this.scrolling) return;

    // 2.停止定时器
    this.stopTimer();

    // 3.保存开始滚动的位置
    this.startX = e.touches[0].pageX;
    },

    touchMove: function (e) {
    // 1.计算出用户拖动的距离
    this.currentX = e.touches[0].pageX;
    this.distance = this.currentX - this.startX;
    let currentPosition = -this.currentIndex * this.totalWidth;
    let moveDistance = this.distance + currentPosition;

    // 2.设置当前的位置
    this.setTransform(moveDistance);
    },

    touchEnd: function (e) {
    // 1.获取移动的距离
    let currentMove = Math.abs(this.distance);

    // 2.判断最终的距离
    if (this.distance === 0) {
    return
    } else if (this.distance > 0 && currentMove > this.totalWidth * this.moveRatio) { // 右边移动超过0.5
    this.currentIndex--
    } else if (this.distance < 0 && currentMove > this.totalWidth * this.moveRatio) { // 向左移动超过0.5
    this.currentIndex++
    }

    // 3.移动到正确的位置
    this.scrollContent(-this.currentIndex * this.totalWidth);

    // 4.移动完成后重新开启定时器
    this.startTimer();
    },

    /**
    * 控制上一个, 下一个
    */
    previous: function () {
    this.changeItem(-1);
    },

    next: function () {
    this.changeItem(1);
    },

    changeItem: function (num) {
    // 1.移除定时器
    this.stopTimer();

    // 2.修改index和位置
    this.currentIndex += num;
    this.scrollContent(-this.currentIndex * this.totalWidth);

    // 3.添加定时器
    this.startTimer();
    }
    }
    }
    </script>

    <style scoped>
    #hy-swiper {
    overflow: hidden;
    position: relative;
    }

    .swiper {
    display: flex;
    }

    .indicator {
    display: flex;
    justify-content: center;
    position: absolute;
    width: 100%;
    bottom: 8px;
    }

    .indi-item {
    box-sizing: border-box;
    width: 8px;
    height: 8px;
    border-radius: 4px;
    background-color: #fff;
    line-height: 8px;
    text-align: center;
    font-size: 12px;
    margin: 0 5px;
    }

    .indi-item.active {
    background-color: rgba(212,62,46,1.0);
    }
    </style>
    1
    2
    3
    4
    5
    6
    7
    8
    9
    10
    11
    12
    13
    14
    15
    16
    17
    18
    19
    20
    21
    22
    23
    <!--SwiperItem.vue-->
    <template>
    <div class="slide">
    <slot></slot>
    </div>
    </template>

    <script>
    export default {
    name: "Slide"
    }
    </script>

    <style scoped>
    .slide {
    width: 100%;
    flex-shrink: 0;
    }

    .slide img {
    width: 100%;
    }
    </style>
    1
    2
    3
    4
    5
    6
    7
    8
    //index.js
    import Swiper from './Swiper'
    import SwiperItem from './SwiperItem'

    export {
    Swiper, SwiperItem
    }
    //统一导出
  • (2)使用轮播图

1
2
3
4
5
6
7
8
9
10
11
12
13
14
15
16
17
18
19
20
21
22
23
24
25
26
27
28
29
30
31
32
33
34
35
36
<!--HomeSwiper.vue:用来整合Swiper和SwiperItem-->
<template>
<div>
<swiper>
<swiper-item v-for="banner in banners"> <!--循环遍历轮播图数据-->
<a :href="banner.link">
<img :src="banner.image" alt=""/>
</a>
</swiper-item>
</swiper>
</div>
</template>

<script>
import {Swiper, SwiperItem} from "../../../components/common/swiper/index";

export default {
name: "homeSwiper",
components: {
Swiper,
SwiperItem
},
props: { //从父组件获取数据
banners: {
type: Array,
default() {
return []
}
}
}
}
</script>

<style scoped>

</style>
1
2
3
4
5
6
7
8
9
10
11
12
13
14
15
16
17
18
19
20
<!--在Home.vue首页使用整合好的轮播图(适当省略内容)-->
<template>
<div id="home">
...
<home-swiper :banners="banners"/> <!--绑定参数传给子组件-->
</div>
</template>

<script>
...
import HomeSwiper from "./childComponents/HomeSwiper";

export default {
...
components: {
HomeSwiper
}
}
</script>
...

2.4 推荐信息

1
2
3
4
5
6
7
8
9
10
11
12
13
14
15
16
17
18
19
20
21
22
23
24
25
26
27
28
29
30
31
32
33
34
35
36
37
38
39
40
41
42
<!--RecommendView.vue-->
<template>
<div class="recommend">
<div v-for="recommend in recommends" class="recommend-item">
<a :href="recommend.link">
<img :src="recommend.image"/>
<div>{{recommend.title}}</div>
</a>
</div>
</div>
</template>

<script>
export default {
name: "RecommendView",
props: { //从父组件获取数据
recommends: {
type: Array,
default() {
return []
}
}
}
}
</script>

<style scoped>
.recommend {
display: flex; /* 水平布局 */
width: 100%;
padding: 5px 0 15px; /* 上下间隔 */
border-bottom: 8px solid #eee; /* 底部边框 */
}

.recommend-item {
text-align: center;
}

.recommend-item img {
width: 80%;
}
</style>
1
2
3
4
5
6
7
8
9
10
11
12
13
14
15
16
17
18
19
20
<!--在Home.vue中使用推荐栏组件(适当省略)-->
<template>
<div id="home">
...
<RecommendView :recommends="recommends"/>
</div>
</template>

<script>
...
import RecommendView from "./childComponents/RecommendView";

export default {
...
components: {
RecommendView
}
}
</script>
...

2.5 FeatureView

  • 由于FeatureView和推荐信息制作方法几乎没有区别,就直接用图片来代替
1
2
3
4
5
6
7
8
9
10
11
12
13
14
15
16
17
18
19
20
<!--FeatureView.vue-->
<template>
<div class="feature">
<a herf="https://act.mogujie.com/zzlx67">
<img src="~assets/img/home/recommend_bg.jpg"/>
</a>
</div>
</template>

<script>
export default {
name: "FeatureView"
}
</script>

<style scoped>
.feature img {
width: 100%;
}
</style>
1
2
3
4
5
6
7
8
9
10
11
12
13
14
15
16
17
18
19
20
21
22
23
24
25
26
27
28
29
30
31
32
33
34
35
36
<!--Home使用FeatureView组件,并按时解决滚动问题(适当省略)-->
<template>
<div id="home">
...
<feature-view />
</div>
</template>

<script>
...
import FeatureView from "./childComponents/FeatureView";

export default {
...
components: {
FeatureView
}
}
</script>

<style scoped>
/* 解决滚动问题 */
.home-nav {
...
position: fixed; /* 固定位置 */
left: 0;
right: 0;
top: 0;
z-index: 9;
}

#home {
padding-top: 44px;
padding-bottom: 45px;
}
</style>

2.6 TabControl实现

1
2
3
4
5
6
7
8
9
10
11
12
13
14
15
16
17
18
19
20
21
22
23
24
25
26
27
28
29
30
31
32
33
34
35
36
37
38
39
40
41
42
43
44
45
46
47
48
49
50
51
52
53
54
55
56
57
58
59
60
61
62
<!--TabControl.vue-->
<template>
<div class="tabControl">
<div v-for="(title, index) in titles"
class="tab-control-item"
:class="{active: currentIndex === index}"
@click="itemClick(index)">
<span>{{title}}</span>
</div>
</div>
</template>

<script>
export default {
name: "TabController",
props: {
titles: {
type: Array,
default() {
return [];
}
}
},
data() {
return {
currentIndex: 0
}
},
methods: {
itemClick(index) {
this.currentIndex = index;
}
}
}
</script>

<style scoped>
.tabControl {
display: flex;
text-align: center;
height: 40px;
line-height: 40px;
background-color: #fff;
}

.tab-control-item {
flex: 1;
}

.tab-control-item span {
padding: 5px;
}

.active {
color: var(--color-high-text);
}

.active span {
border-bottom: 3px solid var(--color-tint);
}

</style>
1
2
3
4
5
6
7
8
9
10
11
12
13
14
15
16
17
18
19
20
21
22
23
24
25
26
27
28
29
30
31
32
33
34
35
36
37
38
39
<!--在首页Home.vue中使用TabControl(适当省略)-->
<template>
<div id="home">
...
<tab-control class="tab-control" :titles="titles"/>
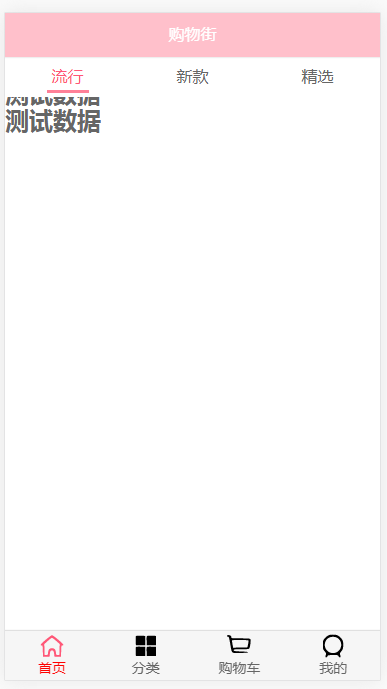
<h2>测试数据</h2>
<h2>测试数据</h2>
<h2>测试数据</h2>
<h2>测试数据</h2>
</div>
</template>

<script>
...
//components
import TabControl from "../../components/common/tabControl/TabControl";

export default {
...
components: {
TabControl
},
data() {
return {
...
titles: ["流行", "新款", "精选"]
}
}
}
</script>

<style scoped>
...
/* 解决TabControl滚动问题 */
.tab-control {
position: sticky;
top: 44px;
}
</style>

2.8 请求商品数据

  • (1)network/home.js添加新的接口请求
1
2
3
4
5
6
7
8
9
10
11
12
13
14
//home.js(适当省略)
import {request} from "./request";
...
//请求商品数据(接口已过时)
export function getHomeGoods(type, page) {
return request({
url: "/home/data",
method: "get",
params: {
type: type,
page: page
}
})
}
  • (2)在home.vue中接收数据并保存
1
2
3
4
5
6
7
8
9
10
11
12
13
14
15
16
17
18
19
20
21
22
23
24
25
26
27
28
29
30
31
32
33
34
35
36
37
38
39
40
41
42
43
44
45
46
47
48
49
50
51
52
53
54
//home.vue(适当省略)
<template>
...
</template>

<script>
...
//network
import {getHomeMultidata, getHomeGoods} from "network/home";

export default {
...
data() {
return {
...
//保存货物信息数据
goods: {
"pop": {page: 0, list: []},
"new": {page: 0, list: []},
"sell": {page: 0, list: []}
}
}
},
created() {
this.getHomeMultidata();

this.getHomeGoods("new");
this.getHomeGoods("pop");
this.getHomeGoods("sell");
},
//封装数据请求,以便复用
methods: {
getHomeMultidata() {
getHomeMultidata().then(res => {
console.log(res.data);
this.banners = res.data.data.banner.list;
this.recommends = res.data.data.recommend.list;
})
},
//请求商品数据
getHomeGoods(type) {
const page = this.goods[type].page + 1;
getHomeGoods(type, page).then(res => {
this.goods[type].list.push(...res.data.data.list); //将两个数组的数据合并为一个数组(特殊语法)
this.goods[type].page += 1; //数据成功获取之后再修改页码
})
}
}
}
</script>

<style scoped>
...
</style>

2.9 展示商品数据

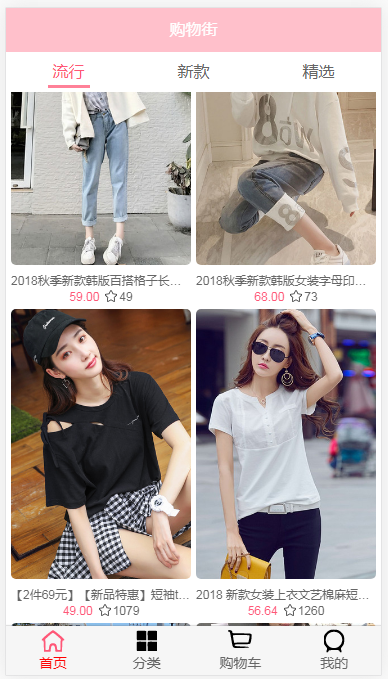
  • (1)创建商品列表子组件
1
2
3
4
5
6
7
8
9
10
11
12
13
14
15
16
17
18
19
20
21
22
23
24
25
26
27
28
29
30
31
32
33
34
35
36
37
38
39
40
41
42
43
44
45
46
47
48
49
50
51
52
53
54
55
56
57
58
59
60
61
62
63
64
65
66
67
68
69
70
71
72
73
74
75
<!-- GoodsListItem.vue -->
<template>
<div class="goodsListItem">
<img :src="singleGoods.show.img" />
<div class="goodsInfo">
<p>{{singleGoods.title}}</p>
<span class="price">{{singleGoods.price}}</span>
<span class="collect">{{singleGoods.cfav}}</span>
</div>
</div>
</template>

<script>
export default {
name: "GoodsListItem",
props: {
singleGoods: {
type: Object,
default() {
return null;
}
}
}
}
</script>

<style scoped>
.goodsListItem {
padding-bottom: 40px;
position: relative;

width: 48%;
}

.goodsListItem img {
width: 100%;
border-radius: 5px;
}

.goodsInfo {
font-size: 12px;
position: absolute;
bottom: 5px;
left: 0;
right: 0;
overflow: hidden;
text-align: center;
}

.goodsInfo p {
overflow: hidden;
text-overflow: ellipsis;
white-space: nowrap;
margin-bottom: 3px;
}

.goodsInfo .price {
color: var(--color-high-text);
margin-right: 20px;
}

.goodsInfo .collect {
position: relative;
}

.goodsInfo .collect::before {
content: '';
position: absolute;
left: -15px;
top: -1px;
width: 14px;
height: 14px;
background: url("~assets/img/common/collect.svg") 0 0/14px 14px;
}
</style>
1
2
3
4
5
6
7
8
9
10
11
12
13
14
15
16
17
18
19
20
21
22
23
24
25
26
27
28
29
30
31
32
33
<!-- GoodsList.vue -->
<template>
<div class="goods">
<goods-list-item v-for="singleGoods in goods" :single-goods="singleGoods"/>
</div>
</template>

<script>
import GoodsListItem from "./GoodsListItem";

export default {
name: "GoodsList",
components: {
GoodsListItem
},
props: {
goods: {
type: Array,
default() {
return [];
}
}
}
}
</script>

<style scoped>
.goods {
display: flex;
flex-wrap: wrap;
justify-content: space-evenly;
}
</style>
  • (2)在Home.vue使用商品列表组件
1
2
3
4
5
6
7
8
9
10
11
12
13
14
15
16
17
18
19
20
21
22
23
24
25
26
27
28
29
30
31
32
33
<template>
<div id="home">
...
<goods-list :goods="goods[type].list"/>
</div>
</template>

<script>
...
import GoodsList from "../../components/context/goods/GoodsList";

export default {
...
name: "Home",
components: {
GoodsList
},
data() {
type: "pop"
}
}
}
</script>

<style scoped>
...
/* 解决TabControl滚动问题 */
.tab-control {
position: sticky;
top: 44px;
z-index: 9;
}
</style>

2.10 点击切换商品列表

  • (1)在TabControl监听点击并发送事件给父组件
1
2
3
4
5
6
7
8
9
10
11
12
13
14
15
16
17
18
19
20
<!-- TabControl.vue -->
<template>
...
</template>

<script>
export default {
...
methods: {
itemClick(index) {
this.currentIndex = index;
this.$emit('tabClick', index); //向父组件发送事件并传参
}
}
}
</script>

<style scoped>
...
</style>
  • (2)父组件接收参数,并修改商品列表
1
2
3
4
5
6
7
8
9
10
11
12
13
14
15
16
17
18
19
20
21
22
23
24
25
26
27
28
29
30
31
32
33
34
35
36
37
38
39
40
41
42
43
44
<template>
<div id="home">
...
<tab-control class="tab-control" :titles="titles" @tabClick="tabClick"/> <!-- 接收发送事件 -->
<goods-list :goods="goods[type].list"/>
</div>
</template>

<script>
...
export default {
data() { //保存网络请求的数据
return {
goods: {
"pop": {page: 0, list: []},
"new": {page: 0, list: []},
"sell": {page: 0, list: []}
},
type: "pop" //决定商品类型
}
},
methods: {
/**
* 事件监听相关方法
*/
tabClick(index) {
switch (index) { //根据参数决定商品类型
case 0:
this.type = "pop";
break;
case 1:
this.type = "new";
break;
case 2:
this.type = "sell";
}
}
}
}
</script>

<style scoped>
...
</style>

三、知识补充:Better-Scroll

3.1 Better-Scroll安装

  • npm run better-scroll --save

3.2 实现局部滚动

1
2
3
4
5
6
7
8
9
10
11
12
13
14
15
16
17
18
19
20
21
22
23
24
25
26
27
28
29
30
31
32
33
34
35
36
37
38
<template>
<div class="wrapper">
<ul class="roll">
...滚动内容
</ul>
</div>
</template>

<script>
import BS from 'better-scroll';

export default {
name: "Category",
mounted() {
new BS('.wrapper', {}); //创建BetterScroll对象
}
}
</script>

<style scoped>
/* 原生CSS实现局部滚动 */
/*
.roll {
height: 200px;
background-color: aliceblue;

overflow-y: scroll;
}
*/

/* 使用Better-scroll实现局部滚动 */
.wrapper {
height: 200px;
background-color: aliceblue;

overflow: hidden;
}
</style>

3.3 Better-Scroll参数

1
2
3
4
5
6
7
8
9
10
11
12
13
14
15
16
const bs = new BS('.wrapper', {
probeType: 3, //0, 1都不实时侦测,2监听手指移动的位置,离开后不监听,3只要滚动,都侦测
pullUpLoad: true, //开启上拉加载
});

//默认情况下,BetterScroll不能实时监听,需要在创建时设置额外参数
//监听:类型(滚动)
bs.on('scroll', (position) => {
console.log(position);
})

//监听:类型(上拉加载)
bs.on("pullingUp", () => {
console.log("上拉加载更多");
bs.finishPullUp(); //支持多次上拉加载
})

3.4 Better-Scroll封装和使用

  • (1)将Better-Scroll封装成一个组件,利用插槽选择要滚动的内容
1
2
3
4
5
6
7
8
9
10
11
12
13
14
15
16
17
18
19
20
21
22
23
24
25
26
27
28
29
30
<template>
<div class="wrapper" ref="wrapper"> <!--用ref标签引用标签元素更准确-->
<div>
<slot></slot>
</div>
</div>
</template>

<script>
import BScroll from "better-scroll";

export default {
name: "Scroll",
data() {
return {
bScroll: null
}
},
mounted() {
this.bScroll = new BScroll(this.$refs.wrapper, {
click: true, //解决作为子组件使用后按钮无法点击
observeDOM: true //解决作为子组件使用后无法滚动
});
}
}
</script>

<style scoped>

</style>
  • (2)使用封装后的组件,以项目的Home.vue为例
    1
    2
    3
    4
    5
    6
    7
    8
    9
    10
    11
    12
    13
    14
    15
    16
    17
    18
    19
    20
    21
    22
    23
    24
    25
    26
    27
    28
    29
    30
    31
    32
    33
    34
    35
    36
    37
    38
    <template>
    <div id="home">
    ...
    <Scroll class="roll"> <!-- 使用better-scroll组件 -->
    <home-swiper :banners="banners"/>
    <RecommendView :recommends="recommends"/>
    <feature-view />
    <tab-control class="tab-control" :titles="titles" @tabClick="tabClick"/>
    <goods-list :goods="goods[type].list"/>
    </Scroll>
    </div>
    </template>

    <script>
    ...
    import Scroll from "../../components/common/scroll/Scroll";

    export default {
    name: "Home",
    components: {
    Scroll
    }
    }
    </script>

    <style scoped>
    ...
    #home {
    padding-top: 44px;
    height: 100vh; /* 视口高度 */
    }

    .roll {
    padding-top: 44px;
    height: calc(100% - 49px);
    overflow: hidden;
    }
    </style>

四、首页开发·续

4.1 BackTop:返回顶部

  • (1)创建BackTop.vue组件

    1
    2
    3
    4
    5
    6
    7
    8
    9
    10
    11
    12
    13
    14
    15
    16
    17
    18
    19
    20
    21
    22
    23
    24
    <template>
    <div class="back-top">
    <img src="../../../assets/img/common/top.png" /> <!--只是使用了一张图片-->
    </div>
    </template>

    <script>
    export default {
    name: "BackTop"
    }
    </script>

    <style scoped>
    .back-top {
    position: fixed;
    right: 10px;
    bottom: 55px;
    }

    .back-top img {
    width: 43px;
    height: 43px;
    }
    </style>
  • (2)首页Home.vue使用组件,并监听点击,返回顶部

1
2
3
4
5
6
7
8
9
10
11
12
13
14
15
16
17
18
19
20
21
22
23
24
25
26
27
28
29
<!-- Home.vue -->
<template>
<div id="home">
。。。
<BackTop @click.native="backClick"/> <!--监听组件点击(原生事件)要使用.native修饰,才能进行监听-->
</div>
</template>

<script>
。。。
import BackTop from "../../components/common/backTop/BackTop";

export default {
。。。
components: {
BackTop
},
methods: {
backClick() {
// this.$refs.scroll.bScroll.scrollTo(0, 0, 1000); // scrollTo(x, y, rollTime):滚动到指定位置
this.$refs.scroll.scrollTo(0, 0, 1000);
}
}
}
</script>

<style scoped>
。。。
</style>
1
2
3
4
5
6
7
8
9
10
11
12
13
14
15
16
17
18
19
<template>
。。。
</template>

<script>
。。。
export default {
methods: {
//封装scrollTo方法,方便父组件调用
scrollTo(x, y, time=1000) {
this.bScroll.scrollTo(x, y, time);
}
}
}
</script>

<style scoped>

</style>
  • (3)监听滚动的位置,来决定是否显示BackTop
1
2
3
4
5
6
7
8
9
10
11
12
13
14
15
16
17
18
19
20
21
22
23
24
25
26
27
28
29
30
31
32
33
<!-- Scroll.vue -->
<template>
...
</template>

<script>
import BScroll from "better-scroll";

export default {
...
props: {
probeType: { //为了更好的封装性,由父组件决定监听滚动类型
type: Number,
default() {
return 0;
}
}
}
mounted() {
this.bScroll = new BScroll(this.$refs.wrapper, {
...
probeType: this.probeType //监听滚动位置
});
this.bScroll.on('scroll', position => {
this.$emit('scrollPosition', position); //向父组件返回事件,并传递位置参数
})
}
}
</script>

<style scoped>

</style>
1
2
3
4
5
6
7
8
9
10
11
12
13
14
15
16
17
18
19
20
21
22
23
24
25
26
27
28
29
30
31
32
<template>
<div id="home">
...
<Scroll class="roll" ref="scroll" :probe-type="3" @scrollPosition="contentScroll"> <!--传参,并接受事件-->
...
</Scroll>
<BackTop @click.native="backClick" v-show="isShowBackTop"/> <!--v-show决定显示-->
</div>
</template>

<script>
...
export default {
...
data() { //保存网络请求的数据
return {
...
isShowBackTop: false
}
}
methods: {
//接受子组件发送的事件,根据位置,决定是否显示
contentScroll(position) {
this.isShowBackTop = position.y < -1000 ? true : false;
}
}
}
</script>

<style scoped>
...
</style>

4.2 实现上拉加载更多功能

  • (1)基本实现
1
2
3
4
5
6
7
8
9
10
11
12
13
14
15
16
17
18
19
20
21
22
23
24
25
26
27
28
29
30
31
32
33
34
35
<!-- Scroll.vue -->
<template>
...
</template>

<script>
...

export default {
...
props: {
...
pullUpLoad: {
type: Boolean,
default() {
return false;
}
}
},
mounted() {
this.bScroll = new BScroll(this.$refs.wrapper, {
...
pullUpLoad: this.pullUpLoad //是否监听上拉加载
});
...
//监听上拉事件
this.bScroll.on('pullingUp', () => {
this.$emit('pullingUp');
this.bScroll.finishPullUp(); //支持多次加载更多
})
}
}
</script>

<style scoped>
1
2
3
4
5
6
7
8
9
10
11
12
13
14
15
16
17
18
19
20
21
22
23
24
25
26
27
28
29
30
31
32
33
<!-- Home.vue -->
<template>
<div id="home">
...
<Scroll class="roll" ref="scroll" :probe-type="3" :pull-up-load="true" @scrollPosition="contentScroll" @pullingUp="loadMore">
...
</Scroll>
</div>
</template>

<script>
...
export default {
...
methods: {
...
getHomeGoods(type) {
const page = this.goods[type].page + 1;
getHomeGoods(type, page).then(res => {
this.goods[type].list.push(...res.data.data.list); //将两个数组的数据合并为一个数组(特殊语法)
this.goods[type].page += 1; //数据成功获取之后再修改页码
})
},
loadMore() {
this.getHomeGoods(this.type);
}
}
}
</script>

<style scoped>
...
</style>
  • (2)解决上拉加载滑动区域bug
    • bug出现的原因:Better-Scroll在加载数据时会计可滑动的区域大小,但图片加载可能有点慢,在Better-Scroll计算完后还没有加载完,导致超出可滑动区域
1
2
3
4
5
6
7
8
9
10
11
12
13
14
15
16
17
18
19
20
21
22
23
24
25
26
27
28
// main.js:利用事件总线解决组件联系跨度大
...
Vue.prototype.$bus = new Vue(); //创建一个全局变量(事件总线)
...
```
```html
<!-- GoodListItem.vue 监听图片加载完成 -->
<template>
<div class="goodsListItem">
<img :src="singleGoods.show.img" @load="imageLoad"/> <!--监听加载-->
...
</div>
</template>

<script>
export default {
...
methods: {
imageLoad() {
this.$bus.$emit('itemImageLoad'); //利用事件总线发送事件
}
}
}
</script>

<style scoped>
...
</style>
1
2
3
4
5
6
7
8
9
10
11
12
13
14
15
16
17
18
19
20
21
22
23
24
<!-- Home.vue:接受事件总线事件,并刷新Better-Scroll重新计算可滑动高度 -->
<template>
...
</template>

<script>
...
export default {
...
mounted() {
//接收图片加载完成事件
this.$bus.$on("itemImageLoad", () => {
// if(this.$refs.scroll) {
// this.$refs.scroll.refresh();
// }
this.$refs.scroll && this.$refs.scroll.refresh(); //利用短路与实现简单判断,如果前面对象为null,会判断为false,就不执行后面方法
})
}
}
</script>

<style scoped>
...
</style>
1
2
3
4
5
6
7
8
9
10
11
12
13
14
15
16
17
18
19
20
21
22
23
<!-- Scroll.vue:封装refresh()方法,并解决空指针错误 -->
<template>
...
</template>

<script>
...

export default {
...
methods: {
...
//封装refresh()方法,方便父组件调用
refresh() {
this.bScroll && this.bScroll.refresh(); //利用短路与实现简单判断
}
}
}
</script>

<style scoped>

</style>
  • (3)解决刷新Better-Scroll频率过高