Featured image of post 【Hugo】Stack主题自定义修改

【Hugo】Stack主题自定义修改

|
|
|

记录一些Stack主题的自定义修改,一般都是不太好分类的,长期更新


TODO:bilibili视频,可能做,可能不做,内容比较杂,不太好做视频


1 修改字体

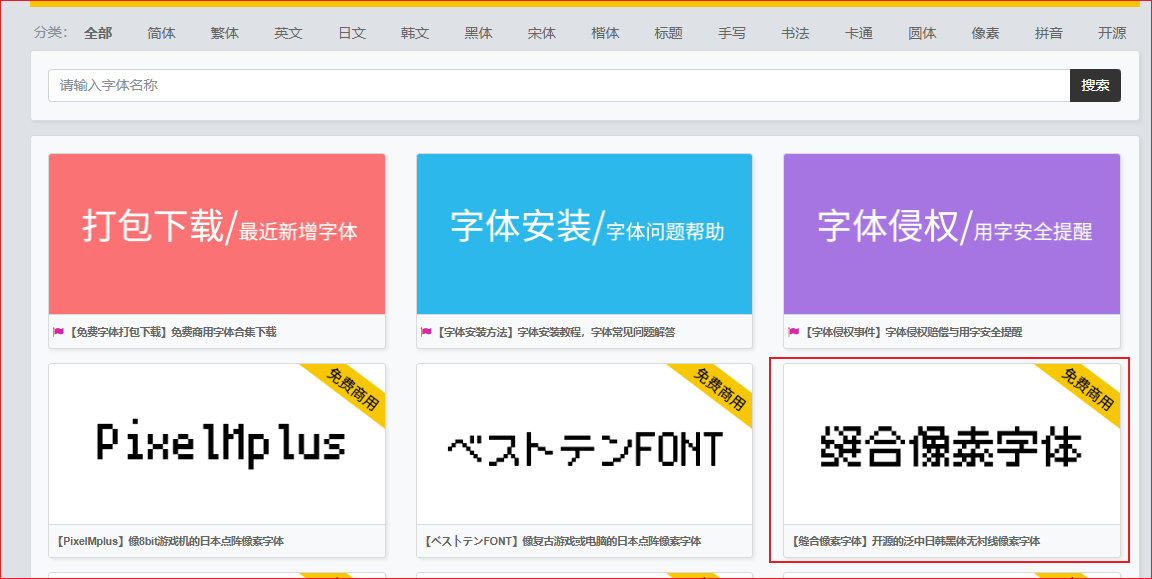
  • (1) 前往【100font】,下载自己想要的字体,这边演示缝合像素字体,字体文件为 fusion-pixel-10px-monospaced-zh_hans.ttf
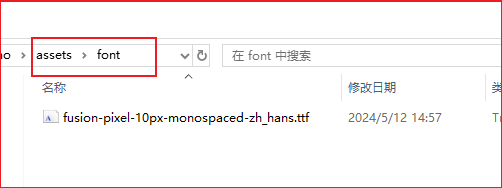
  • (2) 把字体文件放入assets/font下(文件夹自己创建)

  • (3) 将以下代码修改并复制到layouts/partials/footer/custom.html文件中(文件不存在就自己创建)
    • 字体名:给字体命名一个别名,随便填写就好,保持统一就行
    • 字体文件名:字体文件的全名,带后缀名的,也就是 xxx.ttf
 1
 2
 3
 4
 5
 6
 7
 8
 9
10
11
<style>
  @font-face {
    font-family: '字体名';
    src: url({{ (resources.Get "font/字体文件名").Permalink }}) format('truetype');
  }

  :root {
    --base-font-family: '字体名';
    --code-font-family: '字体名';
  }
</style>
  • (4) 这样博客字体就修改好了


2 修改鼠标样式

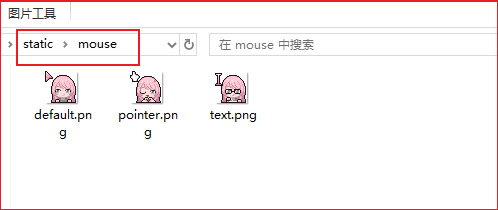
  • (1) 准备好鼠标样式图片(默认,指针,文本…),图片大小建议控制在 32px 左右,将图片放入static/mouse文件夹下(文件夹自己创建)

默认光标 指针光标 文本光标

  • (2) 修改assets/scss/custom.scss(文件不存在则自己创建),将以下代码复制进去,根据主题按实际情况填写对应的css选择器
 1
 2
 3
 4
 5
 6
 7
 8
 9
10
11
// 【鼠标样式常规写法】
body,
html {
  cursor: url(../mouse/默认光标图片名),
  auto !important;
}

css选择器 {
  cursor: url(../mouse/其他光标图片名),
  auto;
}
  • (3) 以下是我调试好的 stack 主题的鼠标样式,同样是stack主题的可以直接复制,修改对应的图片名即可
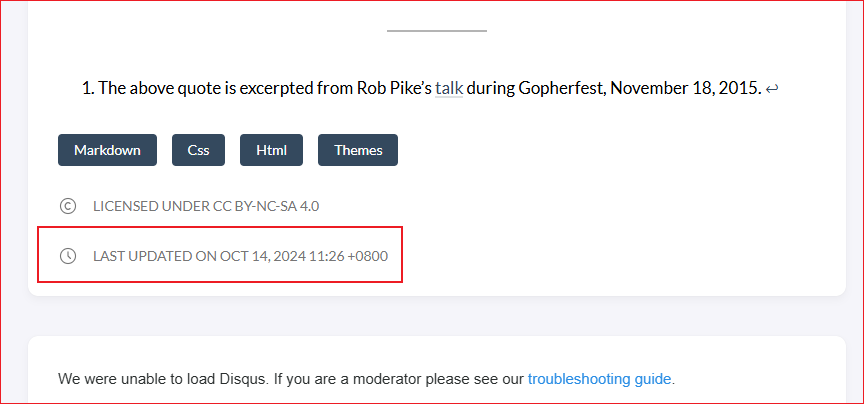
 1
 2
 3
 4
 5
 6
 7
 8
 9
10
11
12
13
14
15
16
17
18
19
20
21
22
23
24
25
26
27
28
// 【Stack主题鼠标样式写法】
// default光标图片
body,
html,
.article-content img {
  cursor: url(../mouse/默认光标图片名),
  auto !important;
}

// pointer光标图片
a:hover,
button:hover,
.copyCodeButton:hover,
#dark-mode-toggle {
  cursor: url(../mouse/指针光标图片名),
  auto;
}

// text光标图片
input:hover,
.site-description,
.article-subtitle,
.article-content span,
.article-content li,
.article-content p {
  cursor: url(../mouse/文本光标图片名),
  auto;
}

3 显示文章更新时间

  • (1) 在配置文件 hugo.yaml 中加入以下配置
1
2
3
4
5
6
7
8
# 更新时间:优先读取git时间 -> git时间不存在,就读取本地文件修改时间
frontmatter:
  lastmod:
    - :git
    - :fileModTime

# 允许获取Git信息		
enableGitInfo: true
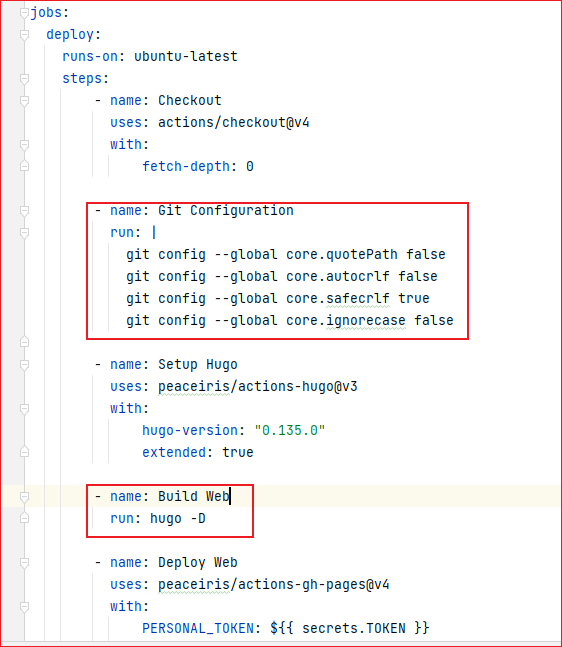
  • (2) 修改github action文件.github/workflows/xxx.yaml,在运行 hugo -D 命令的step前加入以下配置
1
2
3
4
5
6
7
8
9
jobs:
  deploy:
    steps:
      - name: Git Configuration
        run: |
          git config --global core.quotePath false
          git config --global core.autocrlf false
          git config --global core.safecrlf true
          git config --global core.ignorecase false          

  • (3) 这样就提交代码时,就会去读取git时间,来更新文章的更新时间
    • stack主题的文章更新时间在文章底部

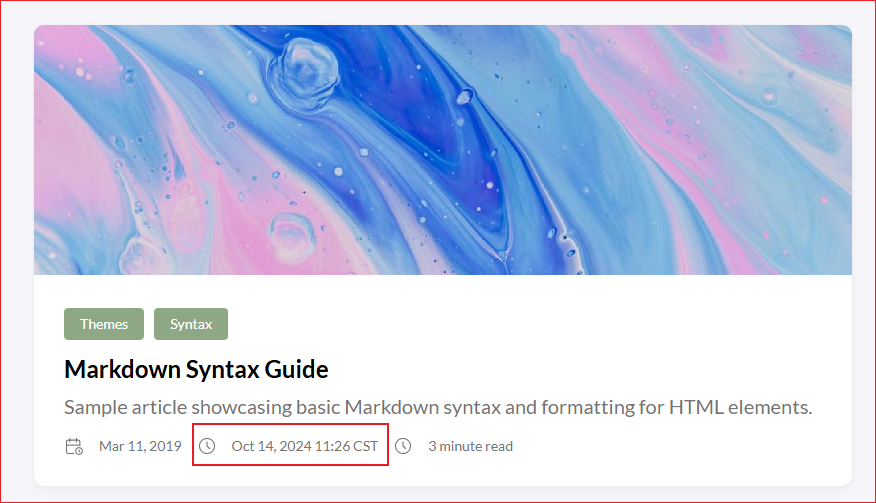
  • (4) 若想在文章开头就显示更新时间,修改layouts/partials/article/components/details.html,在指定位置引入以下代码
 1
 2
 3
 4
 5
 6
 7
 8
 9
10
11
12
13
14
15
16
17
<div class="article-details">
    ...
    <footer class="article-time">
        ...
        <!-- 更新时间 -->
        {{- if ne .Lastmod .Date -}}
            <div class="article-lastmod">
                {{ partial "helper/icon" "clock" }}
                <time>
                    {{ .Lastmod.Format ( or .Site.Params.dateFormat.lastUpdated "Jan 02, 2006 15:04 MST" ) }}
                </time>
            </div>
        {{- end -}}
        ....
    </footer>
    ...
</div>
  • 这样就会文章开头显示修改时间
    • tips: 更新时间的格式去 hugo.yaml 中的 params.dateFormat.lastUpdated 进行修改
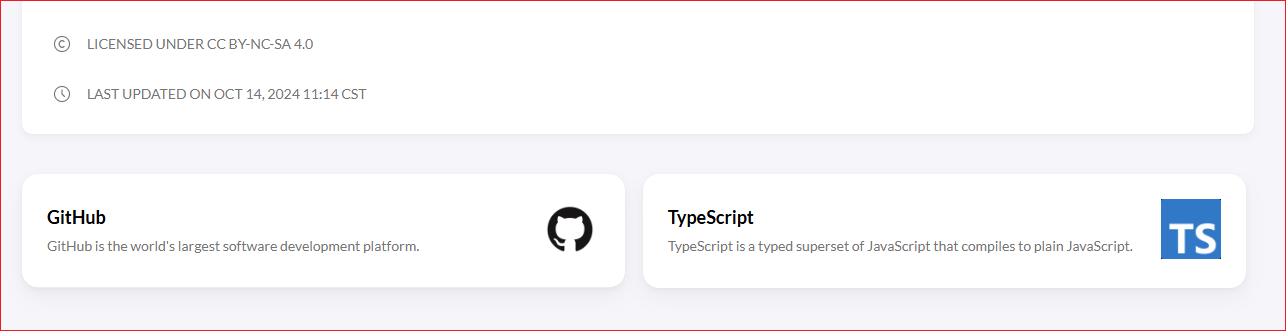

4 友链、归档多列显示

  • 修改assets/scss/custom.scss文件(不存在则自行创建),引入以下css样式代码
 1
 2
 3
 4
 5
 6
 7
 8
 9
10
11
12
13
14
15
16
17
18
19
@media (min-width: 1024px) {
  .article-list--compact {
    display: grid;
    // 目前是两列,如需三列,则后面再加一个1fr,以此类推
    grid-template-columns: 1fr 1fr;
    background: none;
    box-shadow: none;
    gap: 1rem;

    article {
      background: var(--card-background);
      border: none;
      box-shadow: var(--shadow-l2);
      margin-bottom: 8px;
      margin-right: 8px;
      border-radius: 16px;
    }
  }
}


5 文章目录折叠&展开

  • (1) 将以下代码复制到layouts/partials/footer/custom.html文件中(文件不存在则自行创建)
 1
 2
 3
 4
 5
 6
 7
 8
 9
10
11
12
13
14
15
16
17
18
19
20
21
22
23
24
25
26
27
28
29
30
31
32
33
34
35
36
37
38
39
40
41
42
43
44
45
46
<style>
    #TableOfContents > ul, ol {
        ul, ol {
            display: none;
        }
        .open {
            display: block;
        }
    }
</style>

<script>
    function initTocHide() {
        // 判断是否存在文章目录
        let toc = document.querySelector(".widget--toc");
        if (!toc) {
            return;
        }
        // 监听滚动
        window.addEventListener('scroll', function() {
            //清除class值
            let openUl = document.querySelectorAll(".open");
            if (openUl.length > 0) {
              openUl.forEach((ul) => {
                ul.classList.remove("open")
              })
            }
            // 获取active-class
            let currentLi = document.querySelector(".active-class");
            if (!currentLi) {
                return
            }
            // 展示子ul
            if (currentLi.children.length > 1) {
                currentLi.children[1].classList.add("open")
            }
            // 展示父ul
            let ul = currentLi.parentElement;
            do {
                ul.classList.add("open");
                ul = ul.parentElement.parentElement
            } while (ul !== undefined && (ul.localName === 'ul' || ul.localName === 'ol'))
        });
    }
    initTocHide()
</script>
  • (2) 这样文章就会默认隐藏子目录,等滚动到对应的目录后,才会将子目录进行展示


6 添加’返回顶部’按钮

  • (1) 准备一张返回顶部图片(Ctrl+S保存),放到assets/icons文件夹下(不存在则自行创建)

  • (2) 将以下代码复制到layouts/partials/footer/custom.html文件中(不存在则自行创建)
 1
 2
 3
 4
 5
 6
 7
 8
 9
10
11
12
13
14
15
16
17
18
19
20
21
22
23
24
25
26
27
28
29
30
31
32
33
34
35
36
37
38
39
40
41
42
43
44
45
46
47
<style>
    #backTopBtn {
        display: none;
        position: fixed;
        bottom: 30px;
        z-index: 99;
        cursor: pointer;
        width: 30px;
        height: 30px;
        background-image: url({{ (resources.Get "icons/backTop.svg").Permalink }});
    }
</style>

<script>
    /**
     * 滚动回顶部初始化
     */
    function initScrollTop() {
        let rightSideBar = document.querySelector(".right-sidebar");
        if (!rightSideBar) {
            return;
        }
        // 添加返回顶部按钮到右侧边栏
        let btn = document.createElement("div");
        btn.id = "backTopBtn";
        btn.onclick = backToTop
        rightSideBar.appendChild(btn)
        // 滚动监听
        window.onscroll = function() {
            // 当网页向下滑动 20px 出现"返回顶部" 按钮
            if (document.body.scrollTop > 20 || document.documentElement.scrollTop > 20) {
                btn.style.display = "block";
            } else {
                btn.style.display = "none";
            }
        };
    }

    /**
     * 返回顶部
     */
    function backToTop(){
        window.scrollTo({ top: 0, behavior: "smooth" })
    }

    initScrollTop();
</script>
  • (3) 这样当我们页面滚动到一定距离后,右下角会出现返回顶部的按钮,点击后可以平滑地返回顶部


7 macOS风格的代码块

  • (1) 准备一张macOS代码块的红绿灯图片(Ctrl+S保存), 放到static/icons文件夹下

  • (2) 将以下代码复制进assets/scss/custom.scss文件中(不存在则自行创建)
 1
 2
 3
 4
 5
 6
 7
 8
 9
10
11
12
13
14
15
16
.highlight {
  border-radius: var(--card-border-radius);
  max-width: 100% !important;
  margin: 0 !important;
  box-shadow: var(--shadow-l1) !important;
}

.highlight:before {
  content: "";
  display: block;
  background: url(../icons/macOS-code-header.svg) no-repeat 0;
  background-size: contain;
  height: 18px;
  margin-top: -10px;
  margin-bottom: 10px;
}

8 自定义MD引用块颜色模板

1
2
3
<blockquote class="alert alert-{{ .AlertType }}">
    {{ .Text | safeHTML -}}
</blockquote>
  • (2) 将以下代码复制进assets/scss/custom.scss文件中(不存在则自行创建)
 1
 2
 3
 4
 5
 6
 7
 8
 9
10
11
12
13
14
15
16
17
18
19
20
21
22
23
24
25
26
27
28
29
30
31
32
33
34
35
36
37
[data-scheme="light"] {
  .alert-note {
    --card-separator-color: #65bbee;
    --blockquote-background-color: #e7f2fa;
  }
  .alert-tip {
    --card-separator-color: #55aa55;
    --blockquote-background-color: #eeffee;
  }
  .alert-warn {
    --card-separator-color: #ffbb78;
    --blockquote-background-color: #ffeecc;
  }
  .alert-error {
    --card-separator-color: #cc3334;
    --blockquote-background-color: #ffeeef;
  }
}

[data-scheme="dark"] {
  .alert-note {
    --card-separator-color: #006699;
    --blockquote-background-color: #002234;
  }
  .alert-tip {
    --card-separator-color: #336733;
    --blockquote-background-color: #112310;
  }
  .alert-warn {
    --card-separator-color: #aa5501;
    --blockquote-background-color: #452300;
  }
  .alert-error {
    --card-separator-color: #880000;
    --blockquote-background-color: #450000;
  }
}
  • (3) 使用方法
    • 可选项:NOTE | TIP | WARN | ERROR
    • 可仿照上面css写法,自行添加新的css样式,来实现更多的可选项
1
2
> [!NOTE]
> 这是markdown的引用块语法
  • (4) 效果演示

这是NOTE风格

这是TIP风格

这是WARN风格

这是ERROR风格


9 代码块过长折叠&展开

代码块折叠的样式风格完全仿照CSDN来实现的

  • (2) 将以下代码复制进layouts/partials/footer/custom.html(文件不存在则自行创建)
 1
 2
 3
 4
 5
 6
 7
 8
 9
10
11
12
13
14
15
16
17
18
19
20
21
22
23
24
25
26
27
28
29
30
31
32
33
34
35
36
37
38
39
40
41
42
43
44
45
46
47
48
49
50
51
52
53
54
55
56
57
58
59
60
61
62
63
64
65
66
67
68
69
70
71
72
73
74
75
76
77
78
79
80
<style>
    .highlight {
        /* 你可以根据需要调整这个高度 */
        max-height: 400px;
        overflow: hidden;
    }

    .code-show {
        max-height: none !important;
    }

    .code-more-box {
        width: 100%;
        padding-top: 78px;
        background-image: -webkit-gradient(linear, left top, left bottom, from(rgba(255, 255, 255, 0)), to(#fff));
        position: absolute;
        left: 0;
        right: 0;
        bottom: 0;
        z-index: 1;
    }

    .code-more-btn {
        display: block;
        margin: auto;
        width: 44px;
        height: 22px;
        background: #f0f0f5;
        border-top-left-radius: 8px;
        border-top-right-radius: 8px;
        padding-top: 6px;
        cursor: pointer;
    }

    .code-more-img {
        cursor: pointer !important;
        display: block;
        margin: auto;
        width: 22px;
        height: 16px;
    }
</style>

<script>
  function initCodeMoreBox() {
    let codeBlocks = document.querySelectorAll(".highlight");
    if (!codeBlocks) {
      return;
    }
    codeBlocks.forEach(codeBlock => {
      // 校验是否overflow
      if (codeBlock.scrollHeight <= codeBlock.clientHeight) {
        return;
      }
      // 元素初始化
      // codeMoreBox
      let codeMoreBox = document.createElement('div');
      codeMoreBox.classList.add('code-more-box');
      // codeMoreBtn
      let codeMoreBtn = document.createElement('span');
      codeMoreBtn.classList.add('code-more-btn');
      codeMoreBtn.addEventListener('click', () => {
        codeBlock.classList.add('code-show');
        codeMoreBox.style.display = 'none';
        // 触发resize事件,重新计算目录位置
        window.dispatchEvent(new Event('resize'))
      })
      // img
      let img = document.createElement('img');
      img.classList.add('code-more-img');
      img.src = {{ (resources.Get "icons/codeMore.png").Permalink }}
      // 元素添加
      codeMoreBtn.appendChild(img);
      codeMoreBox.appendChild(codeMoreBtn);
      codeBlock.appendChild(codeMoreBox)
    })
  }
  
  initCodeMoreBox();
</script>

根据CC BY-NC-SA 4.0协议授权
使用 Hugo 构建
主题 StackJimmy 设计